Recently, I reactivated an old Asus notebook to use as a NAS. The main point is to benefit from wireless Time Machine backups.
Since it is widely praised I chose FreeNAS for that machine but unfortunately it is not very good documented how to actually get your FreeNAS image on a thumbdrive when you’re running Mac OS X. Most How-Tos require to load the .img file which isn’t available anymore for the most recent versions. So, here we go:
1. Preparations
What do you need?
– A thumbdrive. I use a 4GB drive
– The FreeNAS image file, x86 or x64, depending on architecture.
– Keka, an open source unarchiver (please see the EDIT under 2.).
2. Getting the correct image file
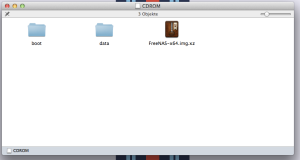
 The FreeNAS .iso file is meant to be used with a CD or DVD so it doesn’t work out of the box on a thumbdrive. However, it includes the correct image, a file named FreeNAS-x64.img.xz (or FreeNAS-x86.img.xz). Keka is one of the few free Mac tools that can unpack .xz files. Unpack it and you will get a 2GB .img file. Store it somewhere you’ll find it later.
EDIT: I tool the liberty and uploaded an already unpacked FreeNAS-x64.img. Feel free to download it from there so you won’t need keka.
3. Getting the image onto the thumbdrive
Theoretically, you could restore the .img file on the thumbdrive with the Disk Utility, but that approach is flawed. Disk Utility often fails to restore images so we do it the old school way by using Terminal and dd.First, you have to find the path to your drive. To do that, open the Terminal and type
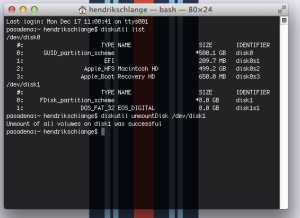
diskutil list
That will give you a list of devices one of which is your USB stick. Note that path, it’ll look something like /dev/disk1. To enable your Mac to partition the drive you’ll have to unmount it. To do so, type
diskutil unmountDisk /dev/yourdrive
The result should look somewhat like this:
 Now you can let your Mac do the magic of transferring the image to the drive.
the command for that is dd and should be like this:
dd if=path/to/file of=path/to/drive.
For example:
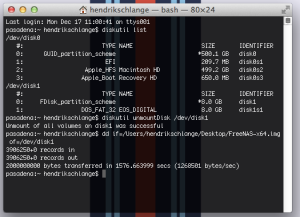
dd if=/Users/Username/Desktop/FreeNAS-x64.img of=/dev/disk1
That process can take quite a while so be patient. I tried it on a very slow merchandise drive and it took 42 minutes.
The result should look like this:
Your Mac will tell you that it can’t read the drive. That’s totally normal, the Mac can’t read the filesystem on the stick. Just hit ignore or unmount and everything will be alright.
Now you’re done. Plug it into your machine and start having fun with FreeNAS!
EDIT: Running Mac OS X 10.9 Mavericks, I had the problem that the Terminal gave me Permission Denied errors when running the last command. Running dd as sudo fixed that for me. So, if you’re having the same problem, just use a command like this:
sudo dd if=/Users/Username/Desktop/FreeNAS-x64.img of=/dev/disk1
You will have to enter your password to run the command as sudo.
